Comfort upgrades and getting used to the Honda CMX 1100 DCT
Introduction
The first few rides on the CMX 1100 were all about getting used to being back on a bike. Although after the accident it was also getting used to a different style of machine, and the DCT system. I also needed to make sure I could find the right level of comfort once back on a bike.
This blog post is in three sections.
The first section is really just some general pictures and a few thoughts on the bike now I have covered around 1,200 miles. The second looks at modifying the OEM seat for a comfort upgrade. The third section covers finding a tidy, reliable way to mount a Garmin Zumo XT Sat‑Nav.
Previously …
I wrote here about getting back on a bike after 277 days of not riding. I also wrote here about my biggest ride to date since then – a very decent day out in Wales. The pictures in this post are from a couple of recent rides and are here to provide a backdrop to some recent changes to the bike.
Worthwhile changes – adding comfort
With those first miles done, it felt like the right time to think about a few changes to the CMX.
I have made two small but worthwhile changes to the bike. One was to replace the OEM seat. The other was to work out a way to mount my Zumo XT. The Zumo challenge was how to keep the handlebars tidy.
Both were simple upgrades, but both make the bike feel better for the rides ahead.
What do I think of the bike?
 Without doubt the CMX is a good bike, it’s easy to ride. It handles pretty well and doesn’t feel anything like you might expect a ‘cruiser’ style bike to feel. I would say it feels more like a heavyweight version of a Kawasaki Vulcan S and that rides nothing like a cruiser!
The bike has a low stance, and has a certain ‘bulk’ to it that suits it. You don’t notice that once your settle onto it.
I would say that it feels like a ‘tidy’ bike. The riding position is pretty relaxed and the DCT is an absolute revelation. The torque from a standing start is impressive and in ‘sport’ mode almost brutal in that 0-60mph zone. I’ve no idea what the actual stats are on this, but I’ve ridden a lot of bikes and I can tell you it’s quick. But there again if you’re primary purpos in buying this bike is for speed you have probably made the wrong choice.
It’s easy to ride and to be honest, the feel of the bike and the pretty steady torque delivery suits real world roads and real world speeds.
Reasonable suspension
The suspension is reasonable. I haven’t made any adjustments and it’s always felt good. It’s quicker and smoother through the bends than you might think for a bike like this and it generally feels good. Having said that, I think the fuelling can feel a little bit ‘jerky’ at low speed when in traffic. But that’s not a big issue, more of an observation.
Wind protection
 The wind protection is minimal – as in almost non-existent on this model, but again that can’t be a surprise to anyone buying it.
Fuel consumption seems to be around the top 50’s per gallon. Range is probably about 180/190 which is a non-issue for day rides and probably reasonable to manage when ‘touring’ I’m hoping to be away soon, probably on the west coast of Scotland for a few days … so time will tell on that one.
It won’t suit everyone
Of course it’s a bike that won’t suit everyone – does such a bike even exist? But I can say it’s a bike that absolutely grows on you with each mile. It feels predictable, steady, and pretty satisfying.
I’d say it’s place is somewhere between a cruiser and a naked but without chasing either style.
Picture set one – on the road
A selection of pictures from some recent and early rides on the CMX.
Click any image to scroll or click through the picture set.


Seat modification and adding more comfort
I bought the CMX 1100 DCT SE model, which comes with the diamond cross‑stitched seat as standard. It’s already an improvement over the earlier stock seat, but for very little money you can take it a step further by fitting the Honda Comfort Seat.
It’s listed at around £81 (about $110), but I picked mine up for just £71 from Doble Motorcycles (UK) — and on the couple of occasions I’ve ordered from them, they’ve been absolutely superb.
For that sort of money, it’s a no‑brainer. I wouldn’t call it a night‑and‑day transformation, and if you only ride short distances you may not notice a huge difference. But if you’re out for a few hours at a time, it’s money well spent.
The comfort seat has slightly deeper padding and a more contoured front section. Swapping it over takes about 30 seconds, and for such a modest upgrade, I’d happily recommend it, check out the picture set below.
Picture set two
Click any image to scroll or click through the picture set.


Adding a Garmin Sat Nav and more comfort for the eyes
I’ve had quite a few bikes over the years and since about 2009/2010 I have always had a sat nav fitted.
The first bike I had a sat nav on was a Suzuki GSX-R 1000 (K8), after that I fitted a sat nav to a Honda Fireblade RR9; Honda CB 1000R; Kawasaki ZX 1000; Kawasaki Vulcan 650S and a BMW RnineT; BMW F800R and a BMW F900 XR.
Each of those bikes had a fairly neat and easy solution. Sometimes they were customised fits – such as on each of the three BMW’s I have owned. On the other bikes it was generally a case of using regular RAM mounts to find the best solution.
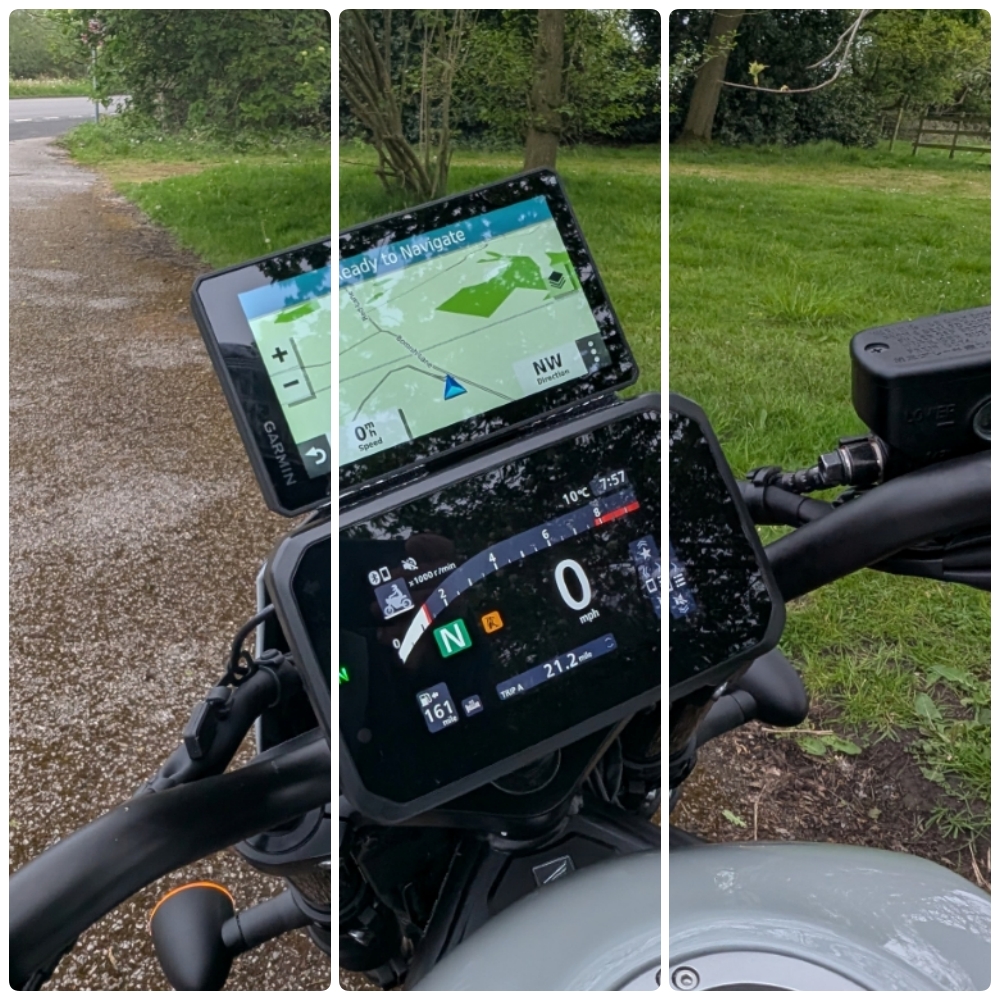
Finding a suitable way and location to mount the Garmin on the CMX was quite a challenge and took me an age to find a solution I was happy with.
RoadSync is OK but …
Of course the bike comes with Honda RoadSync which is an adequate turn by turn navigation system with routes, street names and directional pointers and is presented directly on the TFT screen (as well as audio). It’s similar to the BMW ‘Connected app and that I had built into the TFT on my F900 XR. But neither BMW or Honda versions have anything close to the rich functionality of a dedicated Garmin XP.
I didn’t want to mount the unit ‘offset’ on the bars – that was too much for my low level OCD!
The low down location of the TFT and proximity to the tank also raised some further issues that took me a while to solve when looking for a tank bag solution that didn’t obscure sight of the screen … but that will be covered off in the next blog post.
Various options and attempts
I tried various options using RAM mounts I already had, as well as Garmin power mounts. The first attempts worked OK to a point, but were not vibration free and didn’t quite line up with the TFT in the way I had hoped. In the end and for my final solution, I removed and drilled through the small plastic cover that sits behind the TFT. I then fastened a RAM ball mount to it. You can see the early attempts in Picture set 3
Trial and error and eyeline comfort
 A series of trial and error road tests led to using a large oversized steel washer underneath the plastic cowl so as to get a tight and solid fix. And yes I forgot to photograph that before I fitted it back. I ended up buying a RAM mount with a locking nut which has been perfect since I fitted it. A couple of thin strips of Velcro on the TFT and sat nav and the job is sorted – rock solid and no vibration. You can see how it all lines up in the last two pictures in the set below.
Picture set three
Click any image to scroll or click through the picture set.


Excellent fixes.